1

Pumpkin Spiced Muffins

In cooking up come fresh pumpkin for my son, my step daughter and I decided to creative in the kitchen! Who doesn’t love a beautifully spiced pumpkin recipe?

So this is what we came up with! And man oh man did they turn out awesome! Gluten, dairy, and nut-free 🙂

Ingredients:

  • 4 eggs
  • 3/4 cup melted coconut oil
  • 1  1/2 tsp vanilla
  • 2 cups coconut sugar
  • 3 cups fresh or canned pumpkin puree
  • 1  3/4 cup oat flour
  • 1/4 cup + 2 tbsp coconut flour
  • 1/4 cup arrow root flour
  • 3 tbsp ground flax
  • 5 tbsp hemp hearts
  • 2 tsp baking soda
  • 1 tbsp cinnamon
  • 3/4 tsp nutmeg
  • 1/2 tsp ground ginger
  • 1/4 tsp ground cloves
  • 1 tsp sea salt
  • dairy-free chocolate chips (*Optional)
  • chopped Pecans (*Optional)

Directions:

Heat oven to 375F. Whisk together eggs, coconut oil, vanilla and coconut sugar in a large mixing bowl. Once combined, stir in the pureed pumpkin.

Mix remaining dry ingredients in a separate bowl. Add dry ingredients to wet ingredients and stir well. Allow batter to sit for approximately 10 minutes to allow the coconut flour to absorb some of the liquid. Scoop into greased muffin liners to about 3/4 full. Top with chocolate chips or chopped pecans (optional). Bake for 20-25 minutes or until golden brown and toothpick comes out clean.

Tips & Ideas:

These freeze excellent!
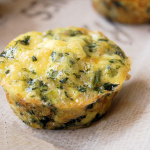


Spinach Egg Muffins

Breakfast seems to be one of those meals that’s not as easy as a bowl of cereal, or a slice of toast once choosing a healthier lifestyle. This easy, filling recipe will have you loving a quick breakfast again. Quick, easy, and perfect for on-the-go!

Ingredients:

  • 8-10 eggs
  • 1 (10 oz) package of fresh spinach
  • 1 clove of garlic, minced
  • 1/4 onion, finely chopped
  • 1 tbsp coconut oil
  • 1 red bell pepper, finely chopped
  • 1 small zucchini, peeled and finely chopped
  • 5  mushrooms
  • 1/2 cup Daiya mozzarella cheese (or cheese of your choice)
  • 1 tbsp of non-dairy milk
  • 1/2 tsp sea salt
  • 1/4 tsp pepper

Directions:

Preheat oven to 375 F. Heat the oil in the skillet over medium heat. Saute onions and garlic until translucent. Add mushrooms and fry until mushrooms are cooked. Add spinach and cook until spinach is wilted (may have to add a bit of water to “steam” the spinach). Set aside and cool slightly.

In a bowl, whisk eggs. Add the chopped red peppers, cheese, salt, pepper, zucchini and spinach mixture. Mix well.

Fill each greased muffin cup with egg mixture 2/3 of the way full. Bake for 20-25 minutes, or until it’s well set and a tester/toothpick inserted into the centre comes out clean.

Leave in the muffin tins for a few minutes or just until it’s cool enough to handle. Cool completely before refrigerating. Muffins will keep about a week in the refrigerator.

Tips & Ideas:

These freeze EXCELLENT! I make a huge batch and freeze the rest. Perfect for breakfasts on the go, or when you just don’t have time to be in the kitchen! Can be served with a side of kimchi, or add to a fresh simple salad. Re-heat in oven, or take out the night before and place in fridge to thaw for the next day.

As a variation, skip the muffin cups and bake this recipe in a baking dish and serve for Sunday brunch!


Fruit Leathers

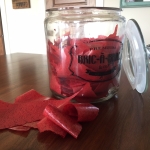
This is probably one of the main reasons I invested in an Excalibur 9-Tray Dehydrator. The kids (and all their friends) love these so much, I can’t keep them stocked up. It’s a wonderful treat for lunches, snacks, camping, road-trips or for when fruit isn’t in season. I haven’t found a kid yet would didn’t love these. And on the plus side, they are crazy simple to make and you can pretty much make them out of anything!

Ingredients:

  • About 12 cups of frozen or fresh fruit (**See notes below for tips)

Directions:

IMG_7692If using frozen fruit, leave in a bowl on the counter overnight to thaw. Place all ingredients in blender (may have to do in batches) and blend until smooth.

Line dehydrator trays with Excalibur re-usable sheets (or parchment paper). Put about 1 1/2 cups of the mix onto the tray and spread into a square shape as evenly as possible about 1/8″ thick***.

IMG_7693Place prepared sheets in the dehydrate and dehydrate at 115 degrees F for 8-10 hours. (Dehydrating time will depend on how thick (and how even) they were spread on the sheets). I find it works best to put them in the dehydrator first thing in the morning and then start checking them mid to late afternoon. You want them flexible, but not wet. You should be able to brush your hands over-top and nothing should stick or indent.

When they are ready, remove from dehydrator and rip into pieces. Store in air tight container. Will last for months! Although that’s never happened in our house 🙂 If you do find any pieces that are too soft or still wet, eat those pieces immediately.

Enjoy!!

Tips & Ideas:

** I always have about 1/3 of the fruit either mango or pineapple. It does something to the texture so they feel more like fruit roll-ups for the kids. (I get frozen bags of organic mango from Costco).

The kids favourite combo is mixed berry (strawberry, raspberry, blueberry, blackberry) and mango.

I’ve attempted to add in banana. My kids didn’t like care for it as much.

As fresh fruits are available locally in your area, I stock up and make what I can with the fresh stuff, and freeze the rest to use at a later date.

*** The instructions given are for an Excalibur dehydrator with 12″ square trays. This recipe should fill 8-9 trays. If you have a different dehydrator you may have to add more or less batter to each tray.


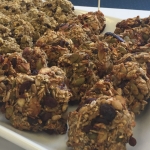
Banana Oat Breakfast Cookies

These breakfast cookies have been a lifesaver for me! My dear friend sent me home with a bag of these cookies and we LOVED them!! Truth be told, they were all I could eat during labour and just after having my first baby. When I asked for the recipe, she said she just threw stuff together! So when I was home from the hospital and feeling good enough, I took her list of ingredients and re-created them to make a recipe to share with all of you!

They are jam packed full of great ingredients, are sugar-free, gluten-free, egg-free & can easily be nut-free!

Ingredients:

  • 6 very ripe medium bananas (mashed)
  • 1 can of full fat coconut milk
  • 4 cups gluten-free rolled oats
  • 1 cup shredded coconut (unsweetened)
  • 1/2 cup slivered almonds (omit for nut-free & replace with sunflower seeds)
  • 1/2 cup pumpkin seeds
  • 1/2 cup hemp hearts
  • 1/2 dried fruit of choice (I love dried cranberries, or cherries)
  • 1/2 cup cacao nibs (or chocolate chips)

Directions:
Pre-heat oven to 350 degrees. In a large mixing bowl, mix the canned coconut milk and mashed bananas (if your coconut milk is too chunky, I heated it on the stove until it was liquified, then mixed it in with the bananas).

Once bananas and coconut milk are well mixed, add in the remaining ingredients. Mixture will appear milky or soupy. Spoon onto parchment lined cookie sheets. Press cookies into a round, flat shape, so they stick together when baking. Bake for 15-20 minutes, or until the edges are just during golden brown.

Allow to cool for 5 minutes on cookie sheets before removing to cooling rack. Cool completely before refrigerating or freezing.

Tips & Ideas:

These freeze EXCELLENT! I made a double batch and froze them all! Perfect for breakfasts on the go, or when you just don’t have time to be in the kitchen (which is actually often for me these days)!!

You also can easily make this recipe your own by adjusting the dry ingredients to whatever you enjoy!


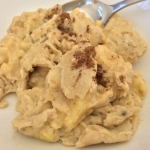
Banana Scrambled Eggs

I know what you’re thinking … bananas and eggs?? We were thinking the exact same thing when my 7 year old niece said she wanted to cook this for breakfast. Turns out we were all shocked when we tasted her creation. It taste like sweet french toast… without the bread or the the sugar! I dare you to give this a try and not absolutely love it!

Ingredients:

  • 1 tbsp coconut oil
  • 2 ripe bananas (chopped into small chunks)
  • 3 eggs (whisked together)
  • 1/2 tsp cinnamon
  • 1/2 tsp vanilla

Directions:

Heat coconut oil in frying pan over medium heat. Add all ingredients to the frying pan. Cook until eggs are fully cooked.

Remove from heat and enjoy!

Tips & Ideas:

Can top with anything you like. My niece had her eggs topped with maple syrup and mixed berries, and I enjoyed mine without adding a thing!


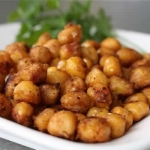
Crunchy Fried Chickpeas

This is a staple in our house. I add this to curry dishes, top off my salads for a nice crunch, or even just eat by the spoonfuls. I love to have this made in the fridge for those days I don’t have time to be in the kitchen! Delicious and filling!

Ingredients:

  • 1 can of chickpeas
  • 2 tbsp coconut oil
  • 1 clove garlic (minced)
  • 1/2 tsp sea salt
  • 1/4 tsp peper

Directions:

Strain and rinse chickpeas and set aside. Heat coconut oil in frying pan over medium-high heat. Add chick peas. Add remaining ingredients and fry until chickpeas are “popping” and crispy. Make sure not to stir too often, as the more you mix them the more likely they will get mushy. You may need to add more coconut oil near the end to ensure they are crispy. Remove from heat & serve.

Tips & Ideas:

These are amazing to eat on their own, or as a topping on your favourite salad to make it more filing. I usually make a frying pan of these and keep it in the fridge. Excellent for a quick snack.

You can also fry these with thinly sliced onions, fresh grated ginger, pinch of crushed chilli peppers or top with fresh cilantro, parsley or freshly squeezed lime.


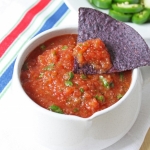
Fermented Salsa

Once you get into fermenting, you will be surprised at how much good can be turned into cultured goodness. This is one of our favourites. And the best part… no one can tell it’s fermented!!

Ingredients:

  • 1 medium onion (diced)
  • 4 large tomatoes (diced)
  • 1 medium red pepper (diced)
  • 1-2 jalapenos (diced)
  • Clove of garlic (minced)
  • Handful of fresh cilantro
  • Lemon and lime juice to taste
  • Starter culture such as Body Ecology Veggie Culture Starter

Directions:

Follow directions on your specific culture starter.

Mix all chopped veggies in bowl, or put in food processor, depending on your desired texture. Add culture starter. Place salsa in jar and fasten lid.

Ferment for 4-7 days at 72 to 78F.Move to fridge where it will keep for several months.

Drain off excess fluid from fermentation, if desired.


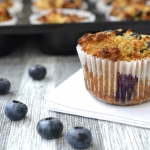
Lemon Blueberry Coconut Muffins

Who doesn’t love having a good muffin to grab on the go? These muffins are gluten-free, nut-free, dairy-free and taste AMAZING!!

Ingredients:

  • 1 cup coconut flour
  • 1/2 tsp sea salt
  • 1 tsp baking soda
  • 2 tsp cinnamon
  • 1   1/4 cup canned coconut milk
  • 4 tbsp chia seeds
  • 6 large eggs (beaten)
  • 1/2 cup raw honey (very soft or melted)
  • 4 tbsp coconut oil (melted)
  • 1 lemon zest
  • 1/8 cup fresh lemon juice
  • 4 tsp vanilla extract
  • 1   1/2 cup frozen or fresh blueberries

Directions:

Preheat oven to 350F.

Mix coconut milk with chia seeds and set aside for at least 10 minutes to thicken (whisking every few minutes to ensure even thickening).

In a separate small bowl, sift dry ingredients and set aside.

In a large bowl mix the rest of the ingredients (except for the blueberries). Add coconut milk mixture to wet ingredients and whisk to combine. Gently add dry ingredients to wet ingredients. Mix until just combined. Add in blueberries and gently fold. Batter will quickly thicken and be on the thicker side.

Pour batter into greased or lined muffin tins, filling 3/4 full. Bake for 20-25 minutes until muffins are golden brown. Immediately remove from tins and cool on wired rack.

Store on the counter for 3-4 days. Freeze excellent!


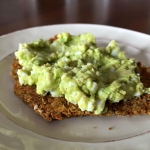
Avocado Egg Salad

This recipe is ridiculously simple and so tasty. I didn’t think egg salad could be good without mayo… enter avocados!

Ingredients:

  • 4 boiled eggs
  • 2 small ripe avocados
  • Juice of 1 lime
  • 1 tsp of Epicures guacamole dip mix (or a combination of dried onion flakes, pinch of dried red chilis, sea salt, dried garlic, dried parsley)

Directions:

  • Mash all ingredients in small bowl and serve!


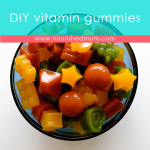
DIY Vitamin Gummies!

I get a lot of questions about how I get my kids to take vitamins, tinctures and juices. My 3 kids see these things as a normal part of the day because its the only thing they know…but it got me thinking about mums who are in transition with their families…

Soooo, for all you mamas trying to put your kids on a healthier path – here is a recipe for some DIY Gummy Vitamins that I promise your kids will LOVE – and you can feel good about them taking.

INGREDIENTS

  • 5 Tablespoons Gelatin Powder (I use this one, grass fed beef)
  • 1-1 1/2 cups fruit/vegetable juice (fresh cold pressed or no sugar added)
  • Sweetener – 2 tablespoons of honey, 2 or 3 drops Stevia (This is our fav – NO bitterness!)
  • Vitamin C (Be careful with this one as most sources are from GMO corn. I like to use Camu Camu Powder. (1-2 tsp)
  • Probiotic (2-50 billion capsules opened)
  • Greens Powder (I like Boku Superfood Powder)

In a small sauce pan over low heat, mix the juice, gelatin and sweetener and stir until smooth. It should be thick and syrup-like. Remove from heat and mix in Camu Camu, Boku and Probiotic.
Very quickly pour into molds or a small dish greased with coconut oil and put in the freezer for 10 minutes to harden. Remove and pop out of molds. For small dish cut into squares.

My FAVOURITE juice combinations
Red/Pink: Red beets, strawberries, carrots and a bit of lemon juice
Orange: Carrots, oranges, ginger and some mango juice
Yellow: Yellow bell pepper, yellow beets, yellow pear, yellow apple and a bit of lemon juice (DO NOT use pineapple juice, your gelatin will not set up due to the enzyme bromelain that’s found in pineapples.)
Green: Kale, kiwi, cucumber, green apple and lime (green grapes would work well, too)
Purple: Purple cabbage, blackberries, blueberries, a bit of red beet and an apple (concord grapes would work well, too)