1

Cashew Sour Cream

One of the things that can suck about giving up dairy… is the staples… like sour cream. This base cashew sour cream recipe will have you stunned. It’s so delicious and can be used anywhere you use traditional sour cream.

Ingredients:

  • 2 cups raw cashews (soaked in water for at least 6 hours)
  • 2 tsp apple cider vinegar
  • 1/4 cup water (up to 1/2 cup)
  • 2 tsp lemon juice

Directions:

Strain soaked cashews (note that if you didn’t have time to soak your nuts for at least 6 hours, you can cheat by soaking them in boiling water for 30 minutes).

Put all ingredients in high speed blender (use only 1/4 cup of the water to start). Blend vigorously on high until mixture appears smooth and creamy. Note, you may have to stop the blender and scrape down the sides a couple times, or even add more water to make the blending easier (and adjust to your desired thickness – Note it will thicken once it’s been refrigerated).

Store in an air tight container in the fridge for up to 6 days.


Butter Chicken with Naan Bread

Who doesn’t love an amazing Indian dish? This dish rivals what you’d order in a traditional indian restaurant… and the best part? It’s dairy and gluten free!

Ingredients:

Naan Bread (makes about 6 small paddies)

  • 1 cup of full fat coconut milk (canned)
  • 1/2 cup almond flour
  • 1/2 cup tapioca flour (or starch)
  • Coconut Oil or Ghee (Optional* for greasing your pan)

Chicken & Marinade

  • 2.2 lbs (1kg) boneless, skinless chicken breast cut into 1″ – 2″ cubes
  • 2 tbsp lemon juice
  • 2 cloves of garlic (minced)
  • 1 tbsp garam masala
  • 1 tsp sea salt

For the Sauce

  • 1/4  cup coconut oil
  • 2 medium/large onions chopped
  • 2 tbsp garlic (minced)
  • 1 inch knob of ginger (grated)
  • 1 tbsp garam masala (add up to 2 tbsp depending on how much spice you prefer)
  • 2 tsp paprika
  • 1/4 tsp cinnamon
  • 2 tsp sea salt
  • 2 cups canned tomatoes (diced, no salt added)
  • 1 can full fat coconut milk
  • 2 tbsp of butter
  • chopped cliantro (for garnish – optional)

Directions:

Combine all marinade ingredients with chopped chicken in a zip-lock bag or shallow baking dish. Massage the marinade into the chicken. Let stand at room temp while you prepare the sauce, or simply put in the fridge to marinade overnight.

Heat coconut oil over medium heat in a large pot. Add onions, reduce heat, and cook until onions are golden brown (about for 20 minutes). Note this is one of the keys to good butter chicken… don’t rush this process. If onions are browning too fast, reduce heat and continue to cook.

Add garlic and allow to cook for about a minute. Add in all your spices (ginger, garam masala, paprika, cinnamon and sea salt). Cook spices for another minute or so.

Add tomatoes. Allow to cook for couple minutes before adding can of coconut milk. Remove pot from stove and puree using an immersion blender (I leave a few chunks). You can use a regular blender, just be careful of steam.

Return sauce to stove top and bring to a good simmer. Add in chicken. Cover and allow to simmer over medium-low heat until chicken is throughly cooked (about 12 minutes). Ensure this is a light simmer as you don’t want to cook your chicken too fast as it will be tough.

Once butter chicken is simmering, start making your naan bread. (It takes longer to cook than you think).

Mix all naan bread ingredients in a small bowl. Heat a small or medium non-stick pan over medium heat. Put in a small amount of ghee once pan is heated up. Pour about 1/4 cup of the batter into your frying pan. Once the batter fluffs up and looks brown and cooked (make sure it’s almost just under burnt, because if you undercook the middle of your naan will be gooey). Flip over and cook the other side (and be patient… this takes a little time). Remove once done, and make your next one! Continue until your batter is gone.

Now your chicken should be done. Add in your butter to your pot, stir until melted. Remove from heat, plate and serve with freshly chopped cilantro and your naan bread. **Optional to serve with rice

Enjoy!


Homemade Ranch Dressing

This clean, dairy-free ranch dressing is perfect for the entire family. Rich, creamy, and full of flavor, your family will easily prefer this to any store-bought stuff.

Ingredients:

Base

  • 1/2 cup cashews (soaked for at least 6 hours)
  • 1/2 cup raw macadamia nuts (soaked for at least 6 hours) – or use cashews if don’t have on hand
  • 2 tbsp Tahini
  • 2 tsp dijon mustard
  • 1 cup almond milk
  • 3 tbsp nutritional yeast 
  • 2-3 cloves of garlic 

Dressing Spices

  • 1 cup of your base cream dressing
  • 1/2 tsp garlic powder
  • 3 tbsp fresh chopped parsley
  • 3 tbsp fresh chopped dill
  • 2 tbsp fresh chopped chives
  • 2 tbsp fresh lemon juice
  • 1/2 tsp onion powder
  • 1/2 tsp sea salt

Place all base ingredients into a high speed blender and blend until smooth.

Once smooth, take 1 cup from your cream base into a small mixing bowl and add all the spices in. Mix by hand.

It’s awesome as a salad dressing, or a dip for veggies!! Should be good in the fridge for 3-4 days.

Oh and this is a tip on how to eat Kale!! (pictured in the background)
Wash and chop kale (removing the stems). Drizzle with olive oil and sea salt and massage in until it feels like every leaf is covered. Let sit for at least 15 minutes (I let it sit while I’m making my dressing). It will soften right up!! It even stores in the fridge like this and is great to eat the next day!


Chocolate Banana Crackers

Who doesn’t love a good treat every now and again? These crackers will hit the spot. When I’m craving something sweet, or chocolate… this is my go-to secret stash that I hide for just myself. Cause it’s just that good.

Ingredients:

  • 12 bananas (mashed well – I whipped mine in the food processor)
  • 1/2 cup cacao (I added it to food processor with the last batch of whipped bananas)
  • 1 tsp vanilla
  • 1 cup slivered almonds
  • 3 cups shredded coconut
  • 1/2 cup sesame seeds

Directions:

Mix all ingredients in large bowl.

Spread mixture into dehydrator trays (this recipe filled 3 of my trays) about 1/4″ thick.

Take a pizza cutter and create a checkered pattern so it’s easier to break apart your crackers when they are done (if you choose).

Dehydrate at 115 overnight (12 hours). Flip and dehydrate another 6-10 hours (until the center isn’t mushy).

Break into pieces while it’s still warm (less crumbs).

Store in airtight container for months.

Eat in moderation. Hahaha. Although I feel like I could eat the entire batch in one sitting!!!


Kelp Noodle Salad with Almond Miso Dressing

Who doesn’t love a good, light, flavourful salad? This salad will have your taste buds jumping and non-salad eaters coming back for seconds.

And more often than not, you’ll find this dressing in my fridge for anytime I’m in the mood for a good salad.

Ingredients:

  • 1 package of kelp noodles
  • 4-6 stems of kale (or a small pre-packaged bag of a kale salad mix)
  • 1 tablespoon extra virgin olive oil

Dressing:

  • 1/4 cup water
  • 3 tbsp raw almond butter (fresh is always best)
  • 1 tbsp sesame oil
  • 2 tsp miso paste
  • 1 clove garlic (minced)
  • 1 tsp dried onion flakes
  • 1 tsp lime juice
  • 1/2 tsp ground ginger
  • 1 drop liquid stevia (or 1 tsp of raw honey)
  • Pinch of red pepper flakes

Directions:

Open and strain the package of kelp noodles. Use scissors to cut the noodles into more manageable sizes. Then put the noodles into your mixing bowl.

Wash kale and remove the stems. Chop into small pieces and add to the mixing bowl.

Drizzle kale and kelp noodles with olive oil and massage in.

Add all dressing ingredients to blender and blend until smooth.

Top salad with prepared dressing and mix until dressing is worked in (sometimes I even use my hands).

Allow to sit for at 30 minutes to allow the dressing to soften the kelp noodles.

Transfer to serving bowl (or your plate) and enjoy!

This recipe even stays crunchy and flavourful the next day for leftovers.


Basic Sourdough Bread

Whether you are a new-be or an expert sourdough bread maker, this simple, fail-proof recipe is amazing. I’m going to break it down step-by-step with photos because if you are like me – a visual is all you need to know you are on the right track. The full recipe is posted near the end of this post.

Your end product… a moist, sour, crusty loaf of sourdough bread. Every loaf comes out tasting a little different and no loaf will look the same.

Perhaps that’s part of the reason I enjoy making this so much, there’s no way to mess it up! It still amazes me that you can get such a great tasting treat from three simple ingredients – water, flour and salt. After making this, I’d never go back to making traditional bread. Ok let’s get started. I like to start this process first thing in the morning (or even better in the evening just before going to bed) as it usually takes all day to rise properly.

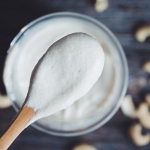
Before starting, your sourdough starter should look something like this:

sourdough starter

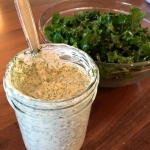
To ensure it’s ready for baking, you could do the float test. It’s very simple. Fill a glass up with warm water, then drop about a 1/2 tsp of your starter into your cup of warm water. If it floats, it’s ready to bake with. (Search it on youtube for a visual if you need).

If you’ve been given sourdough starter and don’t know what to do with it, I really enjoyed Cultures for Health post for instructions and a video on what to do. From experience, I’d ensure that you’ve fed your sourdough starter at least 3 times before baking with it.

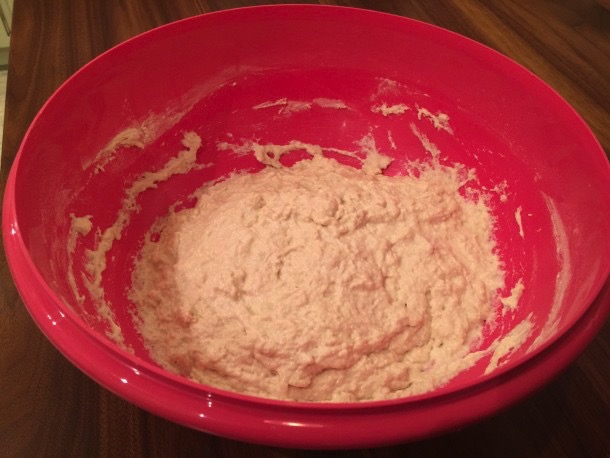
Ok, now that you have your starter ready, get yourself a large mixing bowl and mix together 1 cup starter, 2 cups warm water and 3 cups of your flour. Once mixed well, it should look like this:

fed sourddough

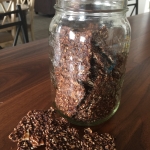
Lightly cover with tea towel. You need to let this mixture sit out anywhere from 2 to 8 hours (or even overnight like I did this time and plan on the next step first thing in the morning). The sponge needs to double in size. I find it’s ready when it’s risen all it can rise and it start collapsing like in the picture below (or as soon as you get up in the morning). The warmer your kitchen, the faster it will rise.

sourdough rise

Now the sponge is ready for the rest of the ingredients. Mix 1 cup of flour with 2 1/2 tsp of sea salt. Add this to your sponge and mix well. Keep adding in flour (a little at a time) until your dough is just slightly sticky and hard to mix with your wooden spoon. You may have to use your hands. You are going to need to use your judgement here – as sour dough is typically stickier than normal bread dough. Depending on your sponge and the type of flour you are using, the amount of flour you add can range anywhere from 1 cup to 3 cups.

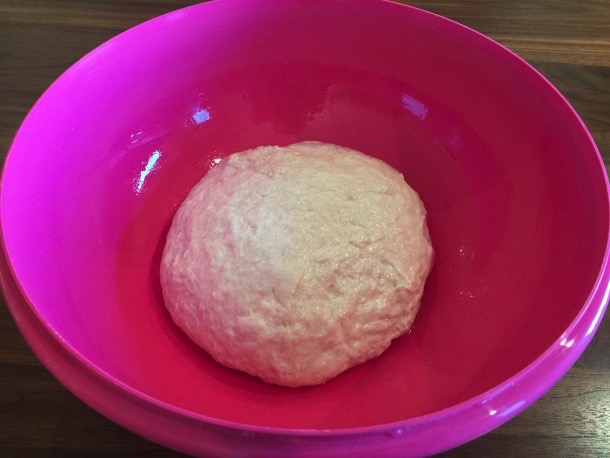
Transfer dough to a lightly floured surface and knead for about 10 to 20 minutes. This step is very important as it activates the gluten. You can take breaks in between, but ensure you knead it well. As the dough is stickier than regular bread dough, make sure to have flour close by to flour your hands (I’ve even lightly oiled my hands). The stickier you can keep the dough, the lighter your bread will be.  Let the dough rest (anywhere from 3 to 10 minutes) as you wash and dry your mixing bowl. Lightly grease your bowl with oil (I used coconut oil).

After it is done resting and your bowl is ready, knead the dough for a couple more minutes. Transferred to greased bowl. Make sure to roll your dough in the grease so the top of your dough isn’t dry and lightly greased. ***If you are wanting to make bread into standard loaves instead of round loaves like here, see notes below at this step.***

sourdough ball


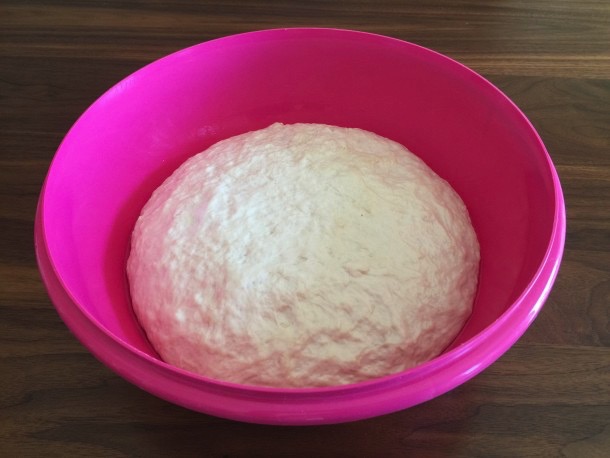
Cover the bowl and set in warm spot. Allow to rise for 1-2 hours until it’s doubled in size. (Again, this may take longer depending on the temperature of your kitchen).

sourgdough rise ball

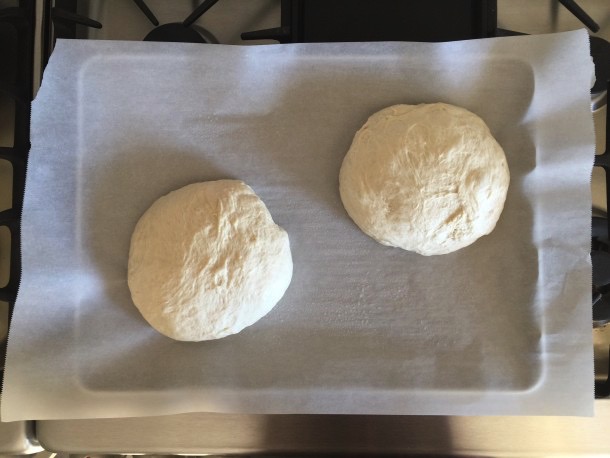
Carefully divide the dough into two equal pieces with a sharp knife, ensuring you handle it as little as possible.

sourgdough cut


Shape into two round loafs and place on lightly greased parchment paper-lined on cookie sheets. (If you don’t have parchment paper you should cause it’s amazing and you’ll never have to clean a cookie sheet again. You could always just use a greased cookie sheet).

sourdough loaves

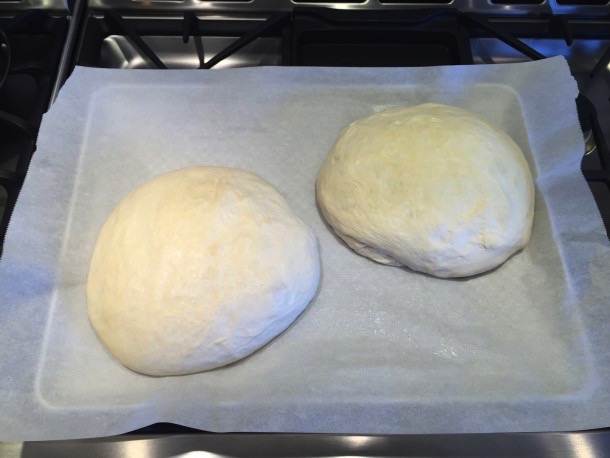
You’ll want to cover the loaves as they rise. I grease another piece of parchment paper and lightly lay it on top.

Let the loaves rise in a warm place until they have doubled in size (about 2-4 hours). You can let the loaves rise as long as 12 hours. The longer you let the loaves rise, the more sour they will be. This time, I let them rise about 4 hours.

sourdough loaves rise


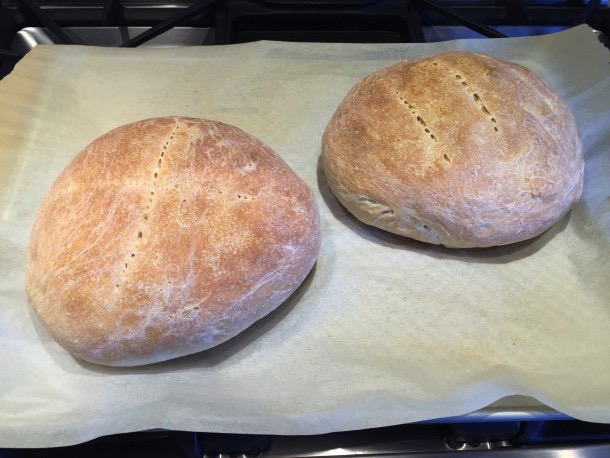
Don’t move your loaves -even if they are touching. You can easily deflate them. Instead pull them apart after they have baked, it will be much easier. Heat your oven to 400 degrees F. Just before your loaves go into the pre-heated oven, gently slash the tops of them like this (or however you want really, this is your bread so get creative!)…

Bake until golden brown (15-35 minutes depending on the size of your loaves).

sourdough finished

Now this is the hardest part… wait until they’ve completely cooled until you slice the bread. (I know this is hard and there was a couple times where we couldn’t wait and had to eat it immediately. It does taste good fresh out of the oven, but it tastes even better after it’s cooled.)

After loaves have completely cooled, store in air tight bag or container on the counter. Bread can easily be frozen as well. Enjoy!!

*** To make standard sandwich bread loaves, follow these instructions after you’ve kneaded your dough***

Once you’ve finished kneading your dough, instead of moving your dough to your greased bowl, cut the dough into two equal pieces. Shape into long logs that will fit into two greased bread pans. Gently set in bread pans, flipping once to ensure the top of your loaves are nicely oiled. Cover with a tea towel in a warm location and let rise 3-8 hours (depending on how warm your kitchen is and how big you’d like your loaves). Transfer to preheated oven (400 degrees F). Bake until golden brown. Cool in pans for 10 minutes and then transfer to wired racks to cool. If you are planning on freezing this bread, I’d suggest slicing it ahead of time so you are able to grab slices from the freezer as you need it.


Basic Sourdough Bread

Ingredients:

  • 1 cup sourdough starter
  • 3 cups flour of choice (white, einkorn, whole wheat)
  • 2 cups water (warm)
  • 1 to 3 cups flour of choice
  • 2 1/2 tsp sea salt
  • 1-2 tbsp oil for greasing (I prefer coconut oil)

Directions:

Pour 1 cup of starter into a large glass or plastic mixing bowl. Add in 3 cups of flour and 2 cups of warm water. Mix vigorously with a wooden spoon. Cover with tea towel, plastic lid, or plastic wrap (just make sure it’s not completely sealed), place on the counter in your kitchen and allow to rise for 2 to 8 hours (or even overnight) until its doubled in size. The longer it’s left to rise, the more sour your bread will be.

After this has doubled in size (or first thing in the morning if you’ve let it rise overnight) remove the cover. In a separarte bowl, combine one cup of flour and the sea salt. Add this mixture to your dough and mix well. Slowly add in more flour, little by little, until your dough comes together and is hard to stir with your wooden spoon (make sure to keep your dough on the stickier side, as it will result in fluffier bread).

Turn the dough onto a lightly floured surface and knead for about 10 to 15 minutes (you can take breaks if you wish). Add additional flour as needed only to keep it from sticking. Give the dough a rest while you clean out your mixing bowl. Ensure to dry it well and then lightly grease it with the oil of your choice (I used coconut oil). Go back to your dough and knead for an additional 5 minutes. ***If you are wanting to make bread into standard loaves instead of round loaves like here, see notes above at this step.

Place the dough in greased bowl, flipping it once to ensure the top of your dough is greased. Cover and let rise another 1-2 hours until it’s doubled in size.

Once it’s doubled in size, take a sharp knife and carefully cut the dough into two parts – ensuring that they are very close the same size. Shape dough into nice oval loaves and set on greased cookie sheet (allowing room for each loaf to expand). Cover and allow to rise until they doubled in size (anywhere from 2 hours to as long as 14 hours if you wish)

When they are ready to bake, preheat oven to 400 degrees F. Remove the cover, slash the tops in the design of your choice and bake for 15-30 minutes until golden brown and sound hallow (ensure not to under bake or over bake your bread). Remove loaves to a cooling rack. Allow to completely cool before slicing (if you have the will power… haha!)

Store in airtight container on the counter or package up for freezing.

Recipe Adapted from pinchmysalt.com


Fermented Beet Salad

This is for the beet lovers out there. Especially for the beet lovers that are on a low-sugar diet or those looking for a healthier alternative than the traditional pickled beets. This amazing recipe will have you eating copious amounts of beets with the nutrient benefits switched on high. Your liver will thank-you.

Ingredients

  • 5 lbs red beets, shredded in food processor
  • Tonnes of dill (about 4 handfuls)
  • Juice of 4-5 lemons
  • 2 cloves garlic
  • 1/4 cup apple cider vinegar
  • Few cabbage leaves
  • Pure water
  • 1 green apple
  • 3 stocks of celery
  • 1 package of culture starter (We recommend Body Ecology Culture Starter)

Directions

Shred all your beets and add to mixing bowl.

Start your culture starter according to the directions on the package and set aside (if no instructions, see below)

Finely chop half of your dill and add that to the mixing bowl.

In a blender, blend 1 green apple, 4 cups water, handful of beets, the celery, garlic, lemon juice and remainder of the dill. Once well blended, add the culture start mixture into the blender and pulse until just combined. Pour this liquid mixture over your beets and mix well.

Stuff clean mason jars with this mixture, leaving about 1.5 inches at the top (This is VERY important, as if ferments it will need this space. If you over fill your jars they could build up enough pressure to explode and create a horrendous mess). Roll up your cabbage leaves to place at the top of each jar before sealing (this too prevents it from an explosion). Seal tightly and wipe the jars clean.

Let sit at room temperature (72F or higher) for at least 1 week. The longer you leave them, the better they taste and more probiotic rich they become!

Once they are to your liking, move to the fridge for storage where they will be good for at least one year (if they last that long)

Eat like you would any pickled beet. Amazing served on salads, in wraps, or simply on the side of a piece of beef.

Using a culture starter:

To make a batch of sauerkraut, a starter is not absolutely necessary. The natural sugars in the veggies will help break it down and render a batch of probiotic goodness. However, if you want to ensure you get a vigorous fermentation, you can dissolve a package of starter culture (a probiotic capsule will also work) in 1/4 cup of warm water (90F). Add a small amount of sugar to feed the starter (ie. cane sugar, honey) and let it sit for 20 minutes or longer to activate.


Hearty Hamburger Soup

Some days, you are just in the mood for a good soup. A common challenge is finding a good healthy soup that will satisfy any hungry men or teenagers you may be feeding. This hamburger soup recipe is hearty, full of great nutrients and guaranteed to fill up even the hungriest of men.

Ingredients

  • 3 tbsp coconut oil
  • 1 large onion (diced)
  • 4 cloves garlic (minced)
  • 1/2 lbs organic ground beef (or bison)
  • 1/2 tsp ground black pepper
  • 1 tsp sea salt (less if beef broth is salted)
  • 1/2 small head of green cabbage
  • 4 large carrots (diced)
  • 3 stocks celery (diced)
  • 1 large clump of fresh parsley (chopped)
  • 4 cups homemade beef broth

Directions

Heat large soup pot over medium heat. Add the coconut oil and diced onions. Cook until onions are almost transparent. Add in minced garlic and cook for another minute. Add the ground beef to the pot and cook until no pink remains. Place the chopped cabbage into the pot with about 1 cup of boiling water. Cover and cook for about 5 minutes. Add remaining ingredients to the pot, saving 1/4 of the chopped parsley for serving.

Depending on how you like your soup (more broth or more “chunky” you can adjust how much broth or water you add). Bring to boil. Reduce heat and simmer covered until vegetables are tender and to your liking (about 20-30 minutes). Ensure flavor is good before removing from heat.

Serve into individual bowls and top with chopped parsley

If you don’t have access to fresh beef bone broth, store bought will work (although you wouldn’t have the health benefits associated with homemade bone broth). You may have to adjust the salt and pepper added based on what you use. This soup is also great to freeze!


Gluten-Free Ginger Cookie

Everyone loves a good soft, chewy ginger cookie. The challenge is making them taste good when you don’t eat gluten. This recipe has become a family favorite as even friends who eat “normal” would choose these over any gluten, re-fined sugar filled cookies.

Ingredients

  • 1 cup gluten-free oat flour
  • 3/4 cup brown rice flour
  • 1/4 cup tapioca flour
  • 1/4 tsp xanthan gum
  • 1 tsp baking soda
  • 2 tsp ground ginger
  • 1 1/2 tsp ground cinnamon
  • 1/2 tsp ground allspice
  • 1/4 tsp sea salt
  • 1/2 cup unsalted organic butter, melted
  • 1/3 cup molasses
  • 2/3 cup + 1/3 cup coconut sugar
  • 1 large egg
  • 1 tsp vanilla extract

Directions

In the medium mixing bowl, combine all the flours, spices, salt and making soda a set aside.

In the large mixing bowl, mix the melted butter, molasses, and 2/3 cup of the coconut sugar. Whisk in the egg and vanilla. Slowly add in the flour mixture (from the medium mixing bowl) and mix vigorously until very well combined.

Cover the dough and put in the refrigerator for at least 2 hours (preferably overnight).

When you want to bake the cookies, preheat the over to 350ºF. Line your cookie sheets with parchment paper. Place 1/3 cup of the coconut sugar in a small bowl. Roll the cookies into 1″ balls and roll in the sugar. Place the sugar coated balls on cookie sheet (about 2″ apart). Press each cookie down slightly with fork or spoon.

Bake the cookies until they are puffed and cracked (about 7-10 minutes). Let cool slightly on cookie sheets before moving to a wire rack to completely cool

Makes about 2 dozen cookies. Freezing the cookie dough is a great idea to ensure you don’t eat the entire batch at once. Freeze individual cookies once they have been pressed down on a cookie sheet. Once they have froze solid, they can be transferred to a freezer safe container for later baking.


Kale Salad with Pecan Parmesan and Cranberries

This is by far my favourite salad this summer, best part of it is its ability to keep in the fridge for a few days which means less time in the kitchen and less dishes!

Ingredients:

For the Salad & Dressing

  • 2 medium bunches destemmed kale (I use the curly kale), finely chopped
  • 2 large garlic cloves
  • 1/4 cup fresh lemon or lime juice (I prefer lime)
  • 3-4 tablespoons extra virgin olive oil, to taste
  • 1/4 teaspoon fine grain sea salt
  • 1/4 teaspoon freshly ground black pepper
  • 1-2 handfuls dried sweetened cranberries, for garnish

For the Pecans

  • 1 cup pecan halves, toasted
  • 1.5 tablespoons nutritional yeast
  • 1 tablespoon extra virgin olive oil
  • 2 pinches fine grain sea salt
  • Optional: Use 1.5 tbsp of coconut sugar to coat pecans instead of nutritional yeast.

Directions:

Preheat the oven to 300F. Spread the pecans onto a baking sheet and toast in the oven for 8-10 minutes until fragrant and lightly golden.
Remove the stems from the kale and discard (you can save for juicing if you are hard core!). Finely chop the kale leaves (the smaller, the better!).
Place dried kale into a large bowl.

For the dressing: Throw garlic, lemon or lime juice, oil, salt and pepper into blender and pulse until well blended. Add to the kale and massage with hands or toss with spoons. Keep mixing for about 1 minute to ensure everything is coated perfectly.

For the pecans: Add in the nutritional yeast, oil, and salt to the pecans and mix until they are fully covered.

Sprinkle the pecans all over the salad. Toss on a handful or two of dried cranberries and serve!

Slight adaptation of original recipe posted by Oh She Glows.